





Installing a water heater correctly is essential for ensuring reliable performance, energy efficiency, and long-term safety. How to Install a Water Heater Safely: A Beginner’s Guide explains the basic steps involved, the tools you may need, and the precautions you should take before beginning. While some experienced homeowners may handle certain installation tasks, electrical and plumbing connections often require a qualified professional. Therefore, following safety guidelines and understanding the installation process will help you make informed decisions and avoid costly mistakes.
Why Safe Water Heater Installation Matters
A properly installed water heater provides dependable hot water while reducing the risk of leaks, electrical hazards, and unnecessary repairs. In addition, correct installation helps the appliance operate more efficiently and can extend its lifespan.
Some of the benefits of safe installation include:
- Reliable hot water supply
- Improved energy efficiency
- Reduced risk of water leaks
- Better electrical safety
- Longer appliance lifespan
- Lower maintenance costs
- Compliance with manufacturer recommendations
Consequently, investing time in proper installation is worthwhile.
Understanding Different Types of Water Heaters
Before installation, it is important to identify the type of water heater you have purchased.
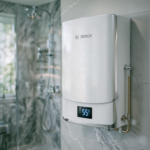
Instant Water Heaters
Instant water heaters heat water only when a tap or shower is turned on.
Advantages include:
- Compact design
- Fast heating
- Energy-efficient operation
- Suitable for apartments and small bathrooms
Storage Water Heaters
Storage water heaters heat and store water in an insulated tank.
Their benefits include:
- Continuous hot water supply
- Ideal for larger households
- Multiple tank capacity options
- Stable water temperature
Since each type has different installation requirements, always follow the manufacturer’s instructions.
How to Install a Water Heater Safely: A Beginner’s Guide
Understanding How to Install a Water Heater Safely: A Beginner’s Guide begins with proper planning. Rushing the installation may lead to safety issues or poor performance.
Step 1: Choose the Right Installation Location
Select a location that provides:
- Easy access for maintenance
- Adequate wall support
- Proper ventilation if required by the manufacturer
- Safe distance from water-sensitive electrical equipment
Additionally, make sure there is enough space around the unit for servicing.
Step 2: Check Your Electrical Supply
Before connecting an electric water heater, confirm that your home’s electrical system meets the manufacturer’s requirements.
Check for:
- Correct voltage
- Suitable circuit capacity
- Proper grounding
- Functional circuit breaker
If you are unsure, consult a licensed electrician.
Step 3: Shut Off Power and Water Supply
Before starting any installation work:
- Turn off the electrical power at the main breaker.
- Shut off the water supply.
- Confirm that no electricity is reaching the installation area.
This step helps reduce the risk of electric shock and water damage.
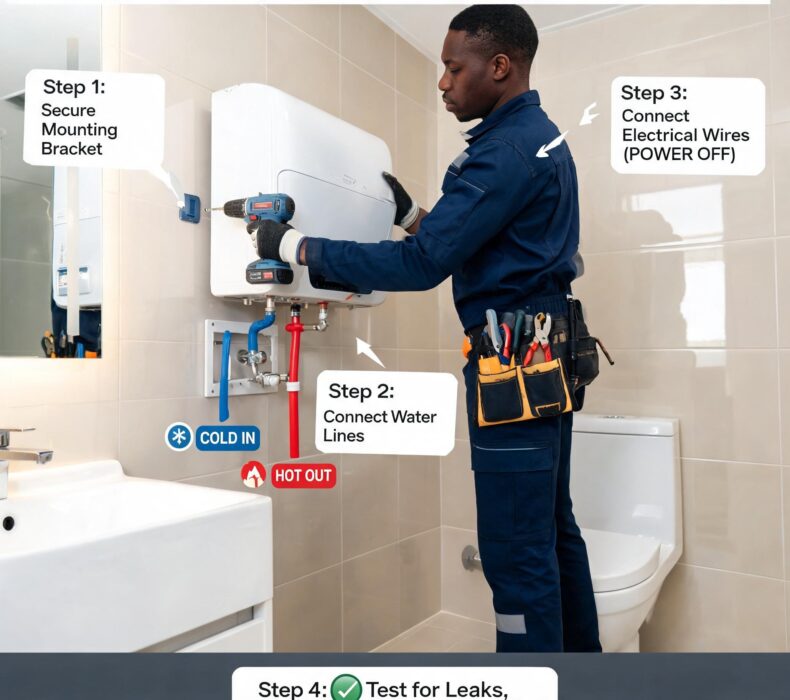
Step 4: Mount the Water Heater Securely
Use the mounting brackets or hardware supplied by the manufacturer.
Ensure that:
- The wall can support the appliance’s weight.
- The heater is level.
- All mounting bolts are tightened securely.
A properly mounted water heater reduces the risk of movement or damage during use.
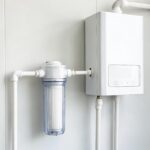
Step 5: Connect the Water Pipes
Connect the cold-water inlet and hot-water outlet according to the manufacturer’s instructions.
When making pipe connections:
- Use the recommended fittings.
- Tighten all joints securely.
- Avoid overtightening, which can damage fittings.
- Check that seals are properly installed.
Afterward, inspect every connection for leaks.
Step 6: Connect the Electrical Wiring
Electrical wiring should always comply with local electrical regulations and the manufacturer’s instructions.
For safety:
- Use the recommended cable size.
- Ensure all connections are secure.
- Confirm proper grounding.
- Never connect damaged wires.
If you are not trained to perform electrical work, hire a qualified electrician.
Step 7: Fill the Tank Before Switching On (Storage Models)
For storage water heaters, allow the tank to fill completely with water before turning on the power.
Switching on an empty storage heater can damage the heating element.
Therefore, open the water supply and allow water to flow steadily before powering the unit.
Step 8: Test the Water Heater
Once installation is complete:
- Restore the power supply.
- Turn on the water heater.
- Check for leaks.
- Verify that hot water is produced correctly.
- Ensure the thermostat functions properly.
Testing confirms that the appliance is operating safely.
Essential Safety Tips
Whether installing an instant or storage water heater, follow these important safety practices.
- Read the user manual carefully.
- Use only manufacturer-approved components.
- Wear appropriate protective equipment.
- Keep the installation area dry.
- Avoid overloading electrical circuits.
- Never ignore unusual sounds or smells after installation.
Furthermore, schedule regular inspections to keep your water heater operating safely.
Tools Commonly Used During Installation
Depending on the installation, you may need:
- Adjustable wrench
- Pipe wrench
- Screwdrivers
- Measuring tape
- Spirit level
- Pipe seal tape
- Drill and mounting hardware
- Safety gloves
- Safety glasses
Always use tools that are suitable for the job and in good condition.
Common Installation Mistakes to Avoid
Many first-time installers make mistakes that affect the water heater’s performance.
Avoid these common errors:
- Choosing the wrong installation location
- Ignoring the manufacturer’s instructions
- Using incorrect electrical wiring
- Failing to check for leaks
- Mounting the heater on a weak wall
- Turning on a storage heater before filling the tank
- Skipping professional assistance for electrical work
Instead, take your time and follow each step carefully.
Should You Install a Water Heater Yourself?
Simple preparation tasks, such as selecting a suitable location or checking available space, can often be completed by homeowners. However, electrical wiring, plumbing connections, and final testing should generally be handled by qualified professionals.
Professional installation offers several advantages:
- Improved safety
- Compliance with local regulations
- Proper electrical connections
- Reduced risk of leaks
- Manufacturer warranty protection in many cases
As a result, professional installation is often the safest choice.
Maintenance After Installation
Proper maintenance keeps your water heater operating efficiently.
To maintain your appliance:
- Inspect for leaks regularly.
- Check electrical connections periodically.
- Flush storage tanks according to the manufacturer’s recommendations.
- Clean the unit when necessary.
- Schedule professional servicing if you notice unusual performance.
Regular maintenance also helps extend the lifespan of your water heater.
Conclusion
Understanding How to Install a Water Heater Safely: A Beginner’s Guide helps homeowners prepare for a safe and successful installation. From selecting the right location and checking your electrical system to testing the appliance after installation, every step plays an important role in ensuring reliable performance.




 Get it on
  Download on the